Thursday, February 27, 2014

Jelly Shots: Dessert for all Occasions

If you are hosting a holiday party this is a perfect easy appetizers that you can make. You want everyone to have a good time. You want to make something festive. You don’t want anything too complicated.This festive finger food is spiked with vodka for a playful party treat.

Holly Jolly Jelly Shots

To make these gourmet recipes jelly shots you have to mix and pour jelly mix in batches. First mix half of red jelly mix in hot water and pour it in a square dish. Then make a mixture of dissolved gelatin with hot water and condensed milk and once the red layer has cooled down and set pour one third of the white mixture. When the white layer is set pour half of the green jelly mix. When the green layer is set add one third white, then remaining half red, one third white and again half green. Let it set in fridge. Cut into square pieces and top with whipped cream, red candies and mint leaves. 


INGREDIENTS

1 3-ounce box cherry gelatin dessert
1 3-ounce box lime gelatin dessert
3 packets unflavored gelatin
1 14-ounce can sweetened condensed milk
1 1/2 cups vanilla vodka
36 dollops whipped cream (for garnish)
36 mint leaves (for garnish)
72 small red candies (or 36 if using just one for garnish)

DIRECTIONS

  1. Lightly coat a square dish with cooking spray, and then using a paper towel, wipe out the dish. It will leave a light residue to help unmold your shots, but it won’t affect the taste.
  2. For red layer, sprinkle half of a packet of gelatin over ¼ cup of water. Allow it to soak in a minute or two. Add one box of the cherry gelatin, along with 1 cup boiling water. Stir until everything has dissolved. Add 3/4 cup of vodka. Repeat the same process to make the green layer.
  3. To make the white layer, sprinkle two packets of gelatin over ½ cup of water. Allow it to soak in a minute or two. Pour in 1 cup of boiling water and one 14-ounce can of sweetened condensed milk. Stir until everything is thoroughly mixed and gelatin is dissolved. You’ll have approximately 3 cups of liquid. Allow to cool to room temperature.
  4. Pour half of the red mixture into the prepared pan. Place pan in refrigerator to set, about 20 minutes or so. Once set, add 1/3 of the white mixture to the top of the red mixture. Pop any air bubbles and return to fridge to set for about 20 minutes. Repeat with half of the green mixture. Then white, then red, then white again, then green. Allow finished pan to set another 2-3 hours, or overnight.
  5. When you’re ready to serve, gently pull the edges away from the pan, and invert onto a cutting board. Slice into even squares. (Alternately, you can just cut in the pan itself, but it might be harder to remove the first few squares).
  6. Place on serving platter and top with whipped cream, using a piping bag or can. Top with a small mint leaf and a red candy (or two) to simulate a holly leaf.

Sunday, February 23, 2014

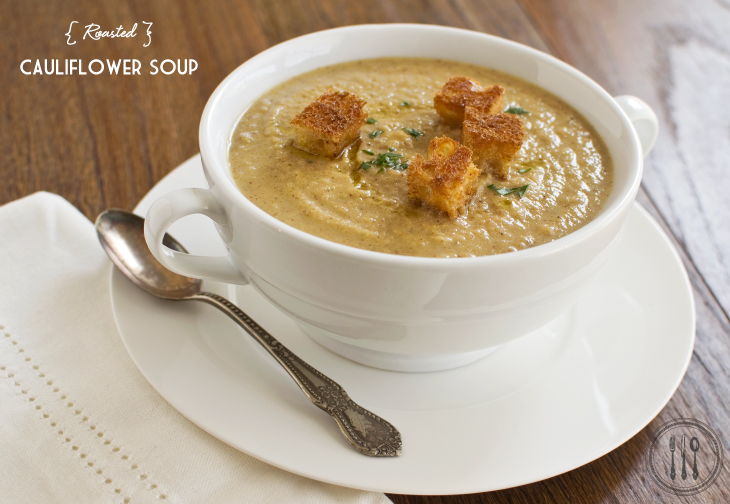
Roasted Cauliflower Soup


Cauliflower provides for each of the nutrients of which it is a good, very good, or excellent source according to our Food Rating System.

While cauliflower is not a well-studied cruciferous vegetable from a health standpoint, you will find several dozen studies linking cauliflower-containing diets to cancer prevention, particularly with respect to the following types of cancer: bladder cancer, breast cancer, colon cancer, prostate cancer, and ovarian cancer. This connection between cauliflower and cancer prevention should not be surprising, since cauliflower provides special nutrient support for three body systems that are closely connected with cancer development as well as cancer prevention. These three systems are (1) the body's detox system, (2) its antioxidant system, and (3) its inflammatory/anti-inflammatory system. Chronic imbalances in any of these three systems can increase risk of cancer, and when imbalances in all three systems occur simultaneously, the risk of cancer increases significantly.

Roasted cauliflower soup are delicious served as a side dish or on a platter with raw vegetables as easy appetizers to go with cocktails. You can drizzle a few drops of nut oil over the cooked cauliflower to enhance the flavor.


Ingredients
Garnish
45 ml (3 tbsp)  unsalted butter
125 ml (1/2 cup)  bread crumbs
30 ml (2 tbsp) flat-leaf parsley, finely chopped
Soup
1 cauliflower, in florets (approximately 700 g or 6 cups)
30 ml (2 tbsp) olive oil
750 ml (3 cups) chicken broth
250 ml (1 cup)  milk
1 bay leaf
3 garlic cloves, chopped
250 ml (1 cup) 35% cream
To taste freshly ground salt and pepper


Directions
To make the garnish, melt the butter in a small saucepan over medium heat. Swirl the pan as the butter foams and continue swirling until it begins to brown. Remove from heat and stir in the breadcrumbs and parsley. Set aside.
Preheat the oven to 210°C (425°F).
In a large bowl, toss the cauliflower with oil to coat. Spread on a parchment-lined baking sheet and roast in the oven for 15 minutes, then turn the florets over and roast another 15 minutes, or until golden brown.
In a large saucepan, combine the broth, milk, bay leaf, garlic cloves and roasted cauliflower. Bring to a boil, reduce heat and simmer, covered, for 30 minutes, or until cauliflower is very tender. Discard the bay leaf and puree the soup in batches in a blender until smooth. Return the soup to a clean saucepan, stir in the cream and reheat. Season with salt and pepper to taste.
Top each portion of soup with a spoonful of the garnish.

Saturday, February 22, 2014

Smoked Salmon Sushi Pizza

These appetizer recipes is the perfect solution for those who are shy away from sushi because of eating raw fish. The key here is cooking the sushi rice properly.Never stir the rice, and keep it covered even when it’s cooling—using a rice cooker is easy, since it can never go wrong. You can find rice wine vinegar already flavored for sushi, so you don’t have to add any sugar. Enjoy these fish recipes for families and friends.


Ingredients:
2 cups short grain sushi rice
100 mL rice vinegar
1.5 tbsp salt
3 tbsp sugar
24 thin slices English cucumber (or more if you overlap, this was a quarter of a cucumber)
1/4 lb (125 g) smoked salmon, thinly sliced
2 tbsp mustard (I used half Dijon, half honey mustard)
1/4 cup Japanese mayonnaise (or yogurt)
1 sheet toasted nori (about 8×7 inches/20×18 cm)
1/4 cup chopped fresh chives or green onions, for garnish
1 tbsp toasted sesame seeds, for garnish

Preparation:
1. Prepare rice as usual. I made mine in the rice cooker, but Bonnie recommends the following: Rinse rice in several changes of water until water runs clear. Drain well. In a medium heavy pot, combine rice and 2 1/4 cups cold water. Allow to rest for 15-30 minutes. Bring rice to a boil, covered, on medium-high heat. Boil for 1 minute. Reduce heat to low and cook for another 10 minutes. Do not lift lid at any time during cooking and resting.

2. Combine rice vinegar with salt and sugar and stir until dissolved.

3. While still hot, transfer rice to large bowl and gently toss with vinegar mixture. Fold the vinegar in, do not mix. It should look like it has a glaze on top of the rice. Cover rice with damp towel if not using right away.

4. Line an 8-inch square baking dish with plastic wrap. Arrange cucumber slices in a single layer on bottom (or overlap them for more cucumber goodness). Arrange smoked salmon slices on top of cucumber. Combine mustard and mayonnaise/yogurt and spread over salmon.

5. Gently and carefully spread half the sushi rice on top of the salmon. Dip your fingers into a bowl of water and gently pat down the rice. Place square of nori on top of rice, cutting it if it does not fit perfectly. Pat on remaining rice. Cover with plastic wrap and weigh down with several heavy cans of food for at least 30 minutes.

6. To serve, unwrap and invert onto a square serving platter. Sprinkle with chives and sesame seeds. Cut into small squares.

Makes 12-16 squares.

Wednesday, February 19, 2014

Power your Day with Energizing Snack

If you choose the right healthy recipes you can experience increased and sustained energy levels and an improved ability to focus and concentrate. The following snack ideas will provide real nutrition to power you through your day in body, mind and spirit.

Crunchy almond butter on celery sticks


Almonds are a nutritional powerhouse of fiber, omega-3 fatty acids, vitamin E, iron and magnesium among other important nutrients. Fiber combined with omega-3 fatty acids is a recipe for hours of satisfaction since both fuel the brain and body for long periods of time. If you cannot find a crunchy brand of almond butter, simply crush your own almonds and mix them in.

Celery is not only low in calories but also high in fiber which fills the stomach and provides hours of satiety. It contains a small amount of calcium, vitamin B6 which contributes to high energy levels, folate, vitamin K and vitamin C among other important vitamins and minerals. These easy appetizers snack will keep your blood sugar levels optimal for hours.

Chopped walnut, apple and cinnamon "salad"


Apples are excellent snacks on their own. They contain a ton of fiber in the form of pectin, which is a filling fiber with numerous health benefits. They also contain vitamins C, polyphenols (potent antioxidants), vitamins A, E and K and only about 60-80 calories depending on their size.

Chopped walnuts are added for satisfying protein, omega-3 fatty acids and a variety of antioxidants in the form of phenols, vitamin E and flavonoids. These nutrients combine to create a powerful source of sustainable energy.

Cinnamon and a small amount of apple cider vinegar are added for a burst of flavor. They also add the important element of blood sugar stabilization. Both of these ingredients are known for their ability to balance blood glucose levels for hours.

Hummus cucumber and olive


The primary ingredient in hummus is the chick pea. Chick peas are high in fiber and protein and are often a staple in a vegan diet because of this. The other main ingredient which gives hummus a distinct flavor and adds much of the nutritional value is tahini.

Tahini is s sesame seed paste. It is rich in amino acids, omega-3 fatty acids, and several B vitamins. It also contains copper, which enhances immunity and helps calm inflammation.

Cucumbers are low in calories and high in water content. They are filling and replenishing to the body without adding a lot of calorie density. They are also a very alkaline food. This means they help reduce destructive acidity in the body. Cucumbers also contain three classes of antioxidants called flavonoids, lignans, triterpenes.

Olives add beneficial monounsaturated fat to this snack. Olives are naturally high in fat for their size which is why one olive goes a long way for flavor and added richness. This particular type of fat allows for sustained energy levels and better brain function. Olives are rich in several classifications of antioxidants as well, which boosts the overall nutritional value of this snack.

Gluten Free Healthy Energizing Snack Recipe Ideas


Tuesday, February 18, 2014

Quinoa-Stuffed Acorn Squash Rings

The quinoa recipes works with apples, dried cranberries, walnuts, onions, and sage.These squash rings make a wonderful main dish for vegetarian. They also make a great appetizer recipes dish for the meat eaters. No one is going to add a ginormous squash half to his or her plate on top of turkey and all the sides, but a squash ring is a different story. Everyone has room for a squash ring!


Ingredients:

olive oil mister or cooking spray
1/2 c. quinoa, rinsed thoroughly
1 c. vegetable broth
1 tbsp. olive oil
1 medium onion, diced
1 apple, cored and diced
1/2 c. shredded sharp, aged or smoked cheddar cheese
1/4 c. dried cranberries
2 tbsp. chopped sage
2 tbsp. chopped walnuts
salt + pepper to taste
1 egg, whisked
3 small acorn or sweet dumpling squash, cut into 1/2-inch slices (remove seeds & guts)
1 tbsp. butter, melted
1 tbsp. maple syrup

Instructions:

Preheat oven to 375 degrees. Spray two rimmed baking sheets with cooking spray or oil and place squash rings on sheets.

Cook quinoa in broth according to package directions. Cool slightly.

Heat olive oil in a medium skillet over medium heat. Add onion. Cook about 10 minutes, or until onion is just beginning to brown. Add apple and cook about 5 minutes more, until apple is softened. Allow to cool slightly.

Combine quinoa, apple and onion mixture, cheese, cranberries, sage, and walnuts in a large bowl. Add salt and pepper to taste. Stir in egg.

In a small bowl, combine butter and maple syrup. Brush tops and insides of squash rings with butter mixture; season with salt and pepper.

Stuff quinoa filling into the center of each squash ring, pressing down to fit as much stuffing as possible without overflowing. Spray centers of squash rings with oil or cooking spray. Bake 30-40 minutes, or until tops are golden brown and squash is tender.


Sunday, February 16, 2014

Pheasant Piccata

Piccata is a very easy dish to make, except for one point: To make the sauce properly, it must be finished with sweet (unsalted) butter off the heat. Skip this and the sauce will break. Have everything ready to go before you start cooking because this pheasant recipes dish comes together quickly.


Serve with mashed potatoes or just a really good piece of bread. An austere white wine, like a Chenin blanc or a Pinot Grigio, would be typical, but I ate most of my piccata with ginger ale. Of course, I was 10 years old at the time.

Ingredients:
· Breasts from 2-3 pheasants, skinless and boneless
· Salt and black pepper
· 1/2 cup flour (any kind: I use rye flour for pheasant)
· 2 tablespoons olive oil
· 1/4 cup unsalted butter, divided
· 1/2 cup white wine
· 2 tablespoons lemon juice
· 2 tablespoons small capers
· 2 tablespoons chopped parsley

Preparation:

Put each breast between two sheets of plastic wrap and pound them flat with a rubber mallet, empty wine bottle or meat mallet. You want them about 1/4 inch thin if you can. Better to err on being too thick than thin. Salt and pepper the cutlets well and dust with the flour. White flour is traditional here, but I like to pair darker flours with game, so I use whole wheat, rye or spelt flour. 

Get the oil and 2 tablespoons of butter hot over medium high heat, and saute to the floured breasts for 3 minutes on one side, 2 minutes on the other. You may need to do this in batches. Move to a plate and tent with foil. 

Pour in the lemon juice and white wine and scrape any brown bits off the bottom of the pan with a wooden spoon. Add the capers and boil this down by half over high heat, maybe 2 minutes. Turn off the heat and put the pheasant breasts on serving plates. Put the remaining butter in the saute pan and swirl it around until it melts. The sauce should be emulsified and smooth. Pour over the pheasant and garnish with the parsley. Eat at once.


Saturday, February 15, 2014

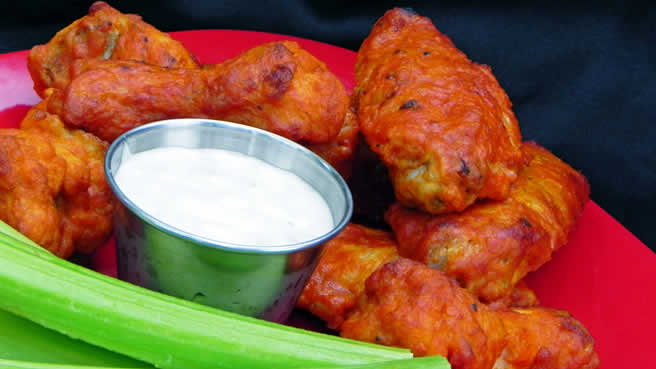
Making Buffalo Wings with Pheasant

Making Buffalo wings with pheasant recipes is very close to doing it with chicken. The only serious difference is that you should par-cook the wings before you roast them. While pheasants are, for the most part, running birds, they do fly enough and live long enough to make them tough without this step. Sometimes you can get away without par-cooking on pen-raised birds, but I par-cook them anyway just to be sure of the gourmet recipes.


Serves 4.
Prep Time: 5 minutes
Cook Time: 2 hours

Ingredients:
· 2 pounds pheasant wings, separated into sections
· 1 quart chicken stock
· 1/3 cup hot sauce (I use Tabasco’s Buffalo Sauce, but Frank’s is traditional)
· 1 tablespoon mild paprika
· 4 tablespoons unsalted butter, melted
· 1/2 teaspoon salt
· 1 teaspoon Chinese chile bean paste (optional)

Preparation:
In a Dutch oven or covered pot, submerge the pheasant wings in the stock; add water if need be to cover. Bring to a simmer and cook for 90 minutes and up to 2 hours — you want the wings to be very tender. Remove the wings and save the stock for another use. 

Pour the hot sauce, paprika, melted butter, salt and chile paste into a container and mix well. Add the wings, toss well to coat and marinate them for at least an hour, and as long as overnight. 

Preheat oven to 375°F. Place the wings on a baking sheet or two in a single layer and bake until they are crispy, 30 to 45 minutes. 

While the wings are cooking, pour the marinade into a small pot and bring to a boil, then drop the heat to low. Keep warm, and when the wings are done, toss them with the sauce before serving. Serve with your favorite blue cheese sauce, celery and lots of beer.


Tuesday, February 11, 2014

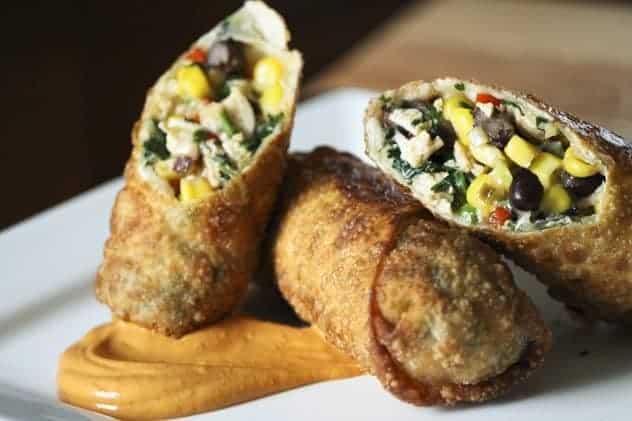
Southwestern Egg Rolls

These crispy Southwestern egg rolls are filled with bright, festive onion, corn, red bell and jalapeno peppers, spinach, parsley or cilantro, melted pepper jack cheese, mild and moist chicken, substantial and creamy black beans and smoky spices.

Southwestern Egg Rolls | Make Ahead Mondays

Made and frozen these lumpia recipe in advance, these make dinners a snap on busy nights and are eagerly anticipated by all.

These Southwestern Egg Rolls are currently the top of the heap of the goodness that is southwestern food best recipes. They’re as easy and delicious when cooked from frozen as they are when you first roll them up. You Use whichever leftover chicken you have whether it’s dark or white meat. If you’re sensitive to spicy foods, you can omit the jalapeno pepper and swap in Monterey Jack for the pepper jack.

Ingredients

To Make and Freeze the Egg rolls


6 cups cooked, cubed chicken (or shredded chicken)
2 cups frozen spinach, thawed and squeezed dry
2 cups frozen corn, thawed
2 cups cooked or canned black beans, drained and rinsed
4 green onions, thinly sliced
1 small onion, peeled and diced
1 red bell pepper stemmed, seeded and diced
1 jalapeno, stemmed, seeded and minced (omit if you prefer milder, less spicy food)
2 garlic cloves, peeled and minced or pressed
1 tablespoon vegetable or canola oil
12 ounces, about 2-3 cups, depending on how coarsely you grate it, pepper jack cheese (use regular Monterey Jack if you prefer less spicy food.)
¼ cup chopped cilantro or parsley
1 teaspoon chili powder
¾ teaspoon ground cumin
salt and pepper to taste
40-50 egg roll wrappers
water in a bowl to moisten and seal the egg roll wrappers

To Cook the Egg Rolls:
canola, peanut or vegetable oil (for deep frying)
~or~
non-stick cooking spray or oil (for baking)

Instructions

To Make and Freeze Egg Rolls:

Heat the vegetable oil in a heavy-bottomed skillet over medium high heat. Add the green onions, onion, red bell pepper, jalapeno pepper, and garlic cloves along with a pinch of salt and stir to combine. Cook over medium high heat for about 2 minutes, or until the peppers and onions are crisp tender. Transfer the contents of the skillet to a large mixing bowl. Stir in all of the remaining ingredients except for the egg roll wrappers and water.

Line 2 large baking sheets with parchment or waxed paper.

Lay one egg roll wrapper out like a diamond with one tip pointing at your stomach. Scoop between ¼ and 1/3 cup of the filling neatly near the center of the egg roll wrapper, just a little bit closer to you than the center.

Pick up the corner closest to you and lift it, draping it over the filling. Use the wrapper to help compress the filling and distribute it so you have a tube of filling.

Fold the left corner over toward the center.

Do the same with the right corner.

Dip your fingers into the bowl of water, moisten along the edges of the top corner, then roll the bottom of the egg roll up toward the top, tightening the roll as you go.

When you roll it up and over the top corner, press lightly against the work surface to help seal it.

Place your sealed egg roll onto the lined pan. Repeat with the remaining filling and egg roll wrappers, trying to leave a little space between the egg rolls on the pan to prevent them from sticking together.

Cover the pans with plastic wrap and place in the freezer until the egg rolls are frozen through, about 4 hours. Transfer the frozen egg rolls into a re-sealable zipper-type freezer bag. Keep frozen for up to 6 months, using them as needed.

To Deep-Fry the Prepared Egg Rolls Before Freezing:

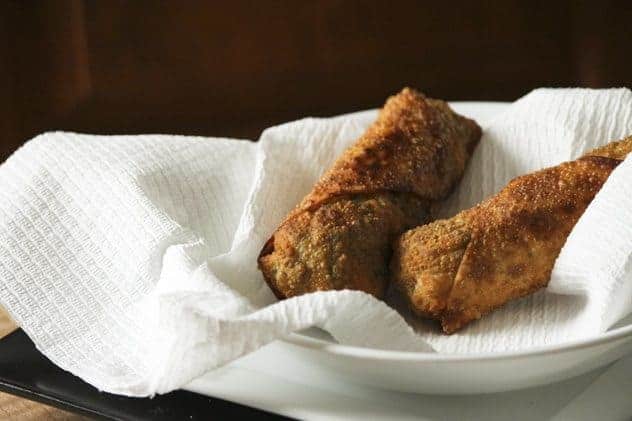
Heat about 2-inches of canola, peanut or vegetable oil in a high-sided heavy-bottomed pan until the oil is shimmery. If you have a deep-frying thermometer, you want the oil to be at 350°F. Carefully lower the desired number of egg rolls into the hot oil, taking care not to crowd the pan. If necessary, fry them in batches to avoid overcrowding. Fry the egg rolls, flipping once if necessary, for about 4 minutes, or until the egg roll wrapper is deep golden brown and the filling is hot all the way through. Transfer to a paper-towel lined plate or pan and let cool for a couple of minutes before serving.
To Deep-Fry Frozen Prepared Egg Rolls:

Heat about 2-inches of canola, peanut or vegetable oil in a high-sided heavy-bottomed pan until the oil is shimmery. Preheat oven to 350°F. If you have a deep-frying thermometer, you want the oil to be at 350°F. Carefully lower the desired number of frozen egg rolls into the hot oil, taking care not to crowd the pan. If necessary, fry them in batches to avoid overcrowding. Fry the egg rolls, flipping once if necessary, for about 6 minutes, or until the egg roll wrapper is deep golden brown and the filling is hot all the way through. Transfer to a paper-towel lined pan. Cut one open to test the heat in the center. If they are not hot, you can remove the paper towels from the pan and put the pan in the oven to finish heating through. Alternatively, you can heat the fried egg rolls for 30 seconds to 1 minute after frying if the centers are not hot. When the filling is hot in the center, let cool for a couple of minutes before serving.
To Bake the Prepared Egg Rolls Before Freezing:

Preheat the oven to 425°F. Spray the desired number of egg rolls all over nonstick cooking spray or brush with oil. Place on a rimmed baking sheet and bake for 10-15 minutes, flipping occasionally, or until the egg roll wrappers are golden brown all the way around and the filling is hot all the way through. Remove the pan from the oven and let stand for 5 minutes before serving.
To Bake the Frozen Prepared Egg Rolls:

Preheat the oven to 425°F. Spray the desired number of egg rolls all over with nonstick cooking spray or brush with oil. Place on a rimmed baking sheet and bake for 15-20 minutes, flipping occasionally, or until the egg roll wrappers are golden brown all the way around and the filling is hot all the way through. Remove the pan from the oven and let stand for 5 minutes before serving.

Wednesday, February 5, 2014

Vegetable Quinoa Pilaf

Quinoa is the seed of a leafy plant native to South America. Quinoa is a delicate flavored, rice-like grain that is a rich source of protein. A delicious and easy quinoa recipes. Serve with a salad and crusty bread for a complete healthy meals.


Ingredients:
4 cups salt-reduced vegetable stock
2 cups (350g) quinoa (see note)
Olive oil cooking spray
2 medium red capsicums, roughly chopped
1 medium eggplant, roughly chopped
2 medium zucchini, roughly chopped
4 green onions, thinly sliced
2 tablespoons fresh oregano leaves
1/3 cup lemon juice
Fresh oregano leaves, to serve


Preparation:
Place stock and quinoa in a large saucepan over medium-high heat. Bring to the boil. Reduce heat to low. Simmer covered, stirring occasionally, for 10 minutes or until just tender. Remove from heat. Set aside, covered for 10 minutes.

Spray a heavy-based saucepan with oil. Heat over medium-high heat. Add capsicum and eggplant. Cook, stirring, for 1 to 2 minutes or until beginning to soften. Cook, covered, for 15 minutes or until softened. Add zucchini, onion and oregano. Toss to combine. Cook, covered, for 5 minutes or until zucchini is tender.

Add zucchini mixture and lemon juice to quinoa. Toss to combine. Season with pepper. Sprinkle with oregano.

Tuesday, February 4, 2014

Berry Gratin With Champagne Sabayon

The sauce of the easy appetizers you need is based on a foamy mixture called a sabayon (a cousin of the light, egg-based Italian dessert zabaglione). A sabayon is made by beating egg yolks with a liquid over simmering water until thickened and increased in volume. ( the liquid can be water, but champagne or wine pairing is often used for a savory sabayon.) The sabayon must not get too hot during cooking or it will become grainy: if it begins to feel warmer than body temperature, remove the pan briefly from the heat, beating continuously, until the mixture cools. Then return the pan to the heat and continue cooking. Sabayon may be served warm or cold; a cold sabayon is beaten off the heat until cooled.


Sabayons may be sweet or savory. They may be served simply as a sauce, often flavored with an alcohol, or they may form the base of some mousse mixtures. They may also be used for sweet or savoury gratins. Cornflour is sometimes added for stability.

Ingredients:

4 handfuls mixed berries
3 egg yolks
2 tablespoons caster sugar
3 tablespoons sparkling wine
Zest of half a lemon


Methods:


  1. Turn the oven on to grill with the rack about 6 inches/15 cm from the heat.
  2. Arrange the berries in individual gratin dishes and set on a baking sheet.
  3. Prepare the Sabayon: Put the egg yolks, sugar, and wine into a roomy glass bowl.
  4. Whisk to mix.
  5. Set the bowl over a saucepan partly-filled with hot, but not simmering, water.
  6. Don't let the bottom of the bowl touch the water beneath.
  7. Whisk until the mixture is frothy, pale, and ribbony, 5 to 8 minutes.
  8. Remove from the water.
  9. Whisk in the zest and keep whisking a minute or two to cool slightly.
  10. Spoon the sabayon over the berries and place under the grill until the sabayon is bubbly and golden, a minute or two.
  11. Transfer to plates and serve immediately.

Sunday, February 2, 2014

Crispy Shrimps With Salty Vinegar Chips

The popularity of how to cook shrimp recipe servings has increased now a days. Shrimp and its close relative the prawn (though restaurants, markets and cookbooks interchange these two) both possess a delicately sweet flavor and high amounts of protein and calcium. In some culinary circles, prawns are used to describe large shrimp and healthy recipes.


Ingredients

6 ounces salt and vinegar chips
16-20 large shrimp
2-3 eggs
Salt
Flour
Canola Oil


Preparation Instructions:

1) Pulse the potato chips in a food processor
2) Remove skin and legs from the shrimp
3) Butterfly the shrimp
4) De-vein the shrimp
5) Rinse the shrimp
6) Whisk together eggs and salt for egg wash
7) Dredge shrimp in flour
8) Dip shrimp in the egg wash
9) Dredge shrimp in potato chips
10) Fry shrimp in 1/2 inch of hot canola oil
11) Cook for 1 1/2 minutes on each side
12) Serve with spicy pickles, spicy pickle tartar sauce, and a lemon